How to format Micro SD/SD card?
A MicroSD/SD (Secure Digital) card is a digital storage device that is often used in portable devices such as digital cameras and cell phones because of its small size and lightweight. Formatting SD cards is usually required to make them compatible with the device that they will be used with. Follow this guide to format your MicroSD/SD card in Windows, Mac OS X, or on your Android device.
Method 1 of 3: Format on Windows
Format the MicroSD/SD card to a FAT or FAT32 format. A 2 GB or less card can be formatted in FAT or FAT32. Cards larger than 2 GB should be formatted in FAT32. Cards larger than 32 GB should be formatted exFAT2.
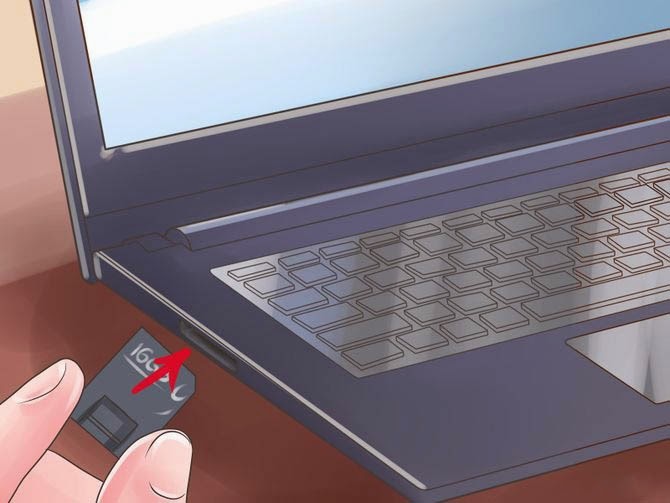
1. Connect the SD card to your computer. If your computer has an SD card slot you can insert the SD card directly into the port. If you are using a MicroSD card, you will need an adapter to allow it to fit into standard SD card ports. If your computer does not have an SD card port built-in, you can use an external USB card reader that plugs into any USB port on your computer. You can link a portable device such as your cell phone or digital camera to your computer (also usually done via USB). You can then insert the SD card into the portable device and it will temporarily act as an SD card reader.

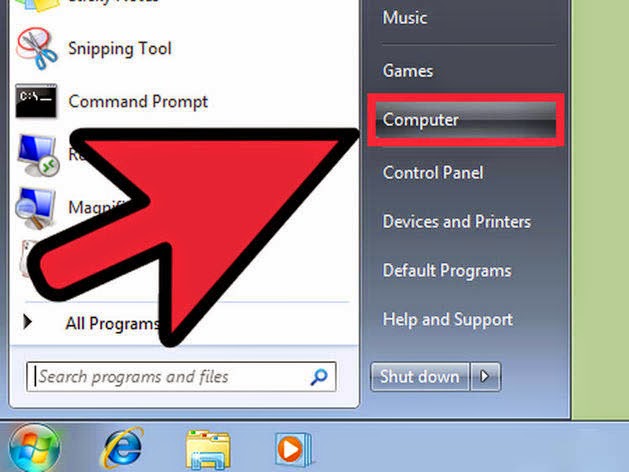
2. Open the Computer window. Click the Start or Windows menu and select Computer (Windows Vista/Windows 7) or My Computer (Windows XP). For Windows 8 users, type “computer” and click the Computer icon in the Apps search results.
3. Find your SD card. The removable drive that appears last in the “Devices with Removable Storage” list should be the SD card that you just connected to your computer. Open the SD card to verify that it is the correct card that you want to format. Return to the Computer screen.

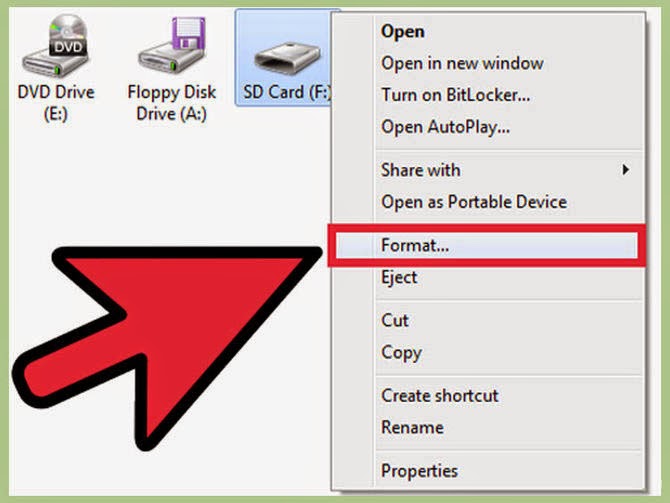
4. Open the Format tool. Right-click on the SD card and select “Format” from the menu that pops up. This will take you to the Format window. Keep “Capacity” and “Allocation unit size” set to default.
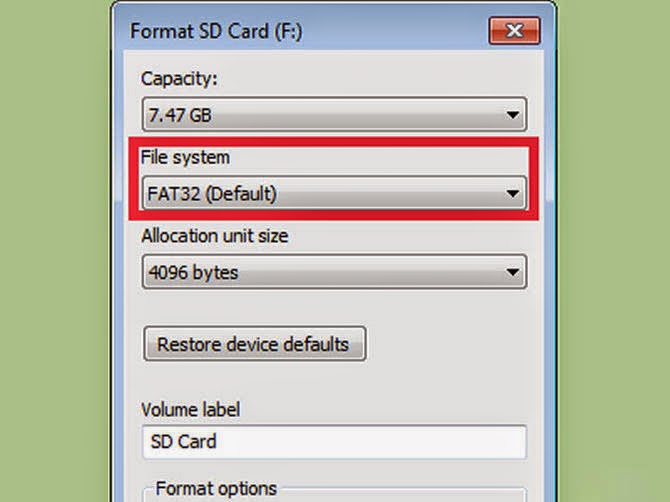
5. Select the file system. This is the way files are stored on the card. Different systems use different file structures. In order for the SD card to be read by any device, select FAT32 as the file system. This will enable it to be read by cameras, phones, printers, Windows, Mac, and Linux computers, and more.
Quick Format: Ticking this box formats your SD card quickly without checking the card for hardware errors. If you are formatting SD cards for the first time or suspect that they are malfunctioning you should leave this option un-ticked.
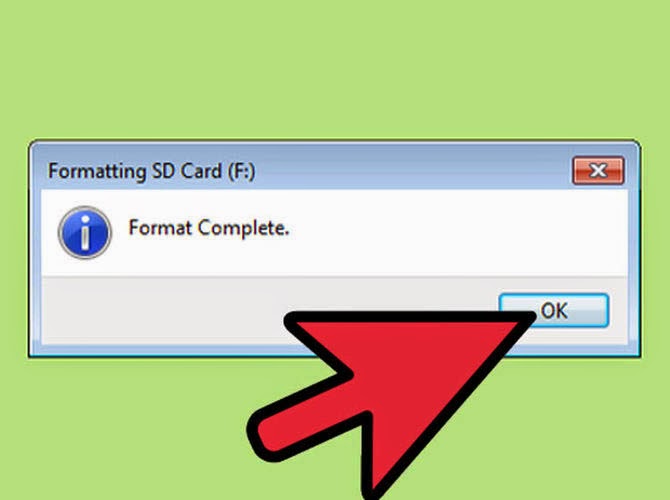
6. Click the Start button after you have made your selections. Press the OK button in the window that pops up to give you confirmation. After you confirm, your SD card will be formatted and you will end up with a blank memory card that can be inserted in any device that accepts SD cards.
Method 2 of 3: Format on Mac OS X
1. Insert the SD card. Use either an internal SD card port or a USB card reader. If you are using a MicroSD card, you will need an adapter that allows it to plug into a standard SD card port. The SD card will mount automatically onto your desktop when inserted.
2. Open the Disk Utility. You can find the Disk Utility program in the Utilities folder in your Applications. Select the SD card from the list of drives in the left frame.
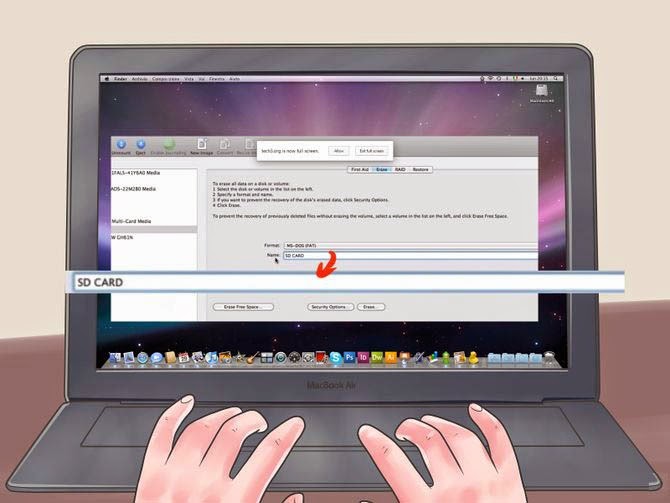
3. Erase the SD card data. Select the Erase tab in the main window after selecting your SD card. Select FAT32 from the Volume Format drop down menu and enter a name of the SD card in the Name field. Click Erase… when you are ready to format. Disk Utility will ask you to confirm. Formatting the SD card will erase all of the data stored on it. Be sure that you have made backups of any important files before formatting.
Method 3 of 3: Format on Android
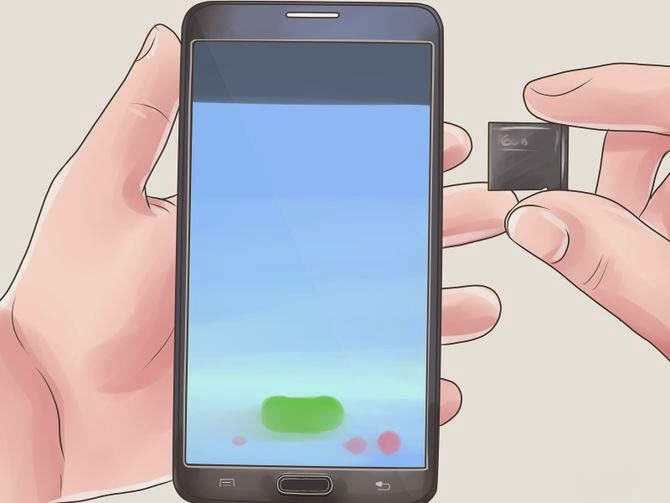
1. Insert your MicroSD card. For phones the MicroSD port is typically behind the battery. You will need to open the back panel and remove the battery to access the slot. The card should slide in and click into place. Do not force the card. Tablets typically have SD card readers on the side of the tablet. Refer to your product’s documentation to find the exact location.
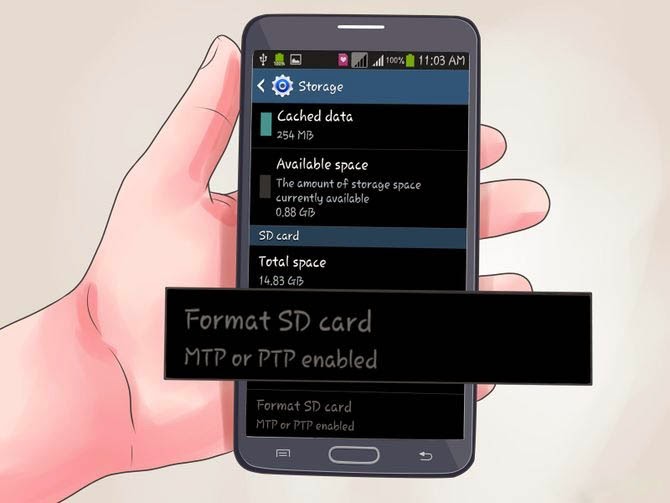
2. Open the device’s Storage Settings. After inserting the SD card, open the Settings by tapping the Menu button while viewing the Home screen, or by opening the Settings app from the App Drawer. Select Storage from the Settings menu, under the Device heading.
3. Unmount the SD card. Tap “Unmount SD card” option.

4. Format the SD card. In the Storage sub menu, scroll down to the SD card section. Tap “Format SD card” to begin the format process. Tap the button again to continue. If your SD card is locked, you will need to enter your SD card PIN. Once you do, the format will proceed. All of your data will be lost. Be sure that you have backed up any important files from the SD card before formatting.